
Let's be honest. Walking into a cleanroom should not feel like an elaborate process or some kind of complex ritual. If you have ever tried to balance a tray of sensitive cell cultures while wrestling with a sticky swing door, you know exactly how frustrating that scenario can be. Beyond the personal annoyance, every single time a person touches a handle or pushes a door open with a hip or shoulder, they introduce a small but real risk of contamination. It completely defeats the purpose of the controlled environment. This is precisely why automatic sliding doors have become the standard choice across pharmaceutical labs, semiconductor fabs, and healthcare facilities. They just make logical sense. You approach the entrance, wave a hand near the sensor, and the door glides open quietly and smoothly. You pass through without touching a single surface, and then the door seals itself shut behind you, restoring the critical pressure balance of the room.
While the end result feels seamless and almost magical in its simplicity, getting one of these doors properly installed is not a job for a weekend handyman or a general contractor who does not understand air pressure differentials. An automatic sliding cleanroom door is a precision engineered piece of equipment. To function correctly over the long term, the alignment must be absolutely perfect, the mounting must be bombproof, and the seals must be airtight. If the overhead track is even slightly unlevel, the door will groan, drag, or eventually fail to close. If the perimeter gaskets are not seated correctly, you will lose the room's positive pressure, allowing unfiltered air to sneak in. If the motion sensors are too sensitive, the door will trigger every time someone walks past in the hallway, which is both irritating and a disruption to the airlock balance. Industry reports suggest that roughly thirty percent of contamination incidents in controlled spaces can be traced back to door seal failures or doors that were simply not installed or maintained to the proper standards.
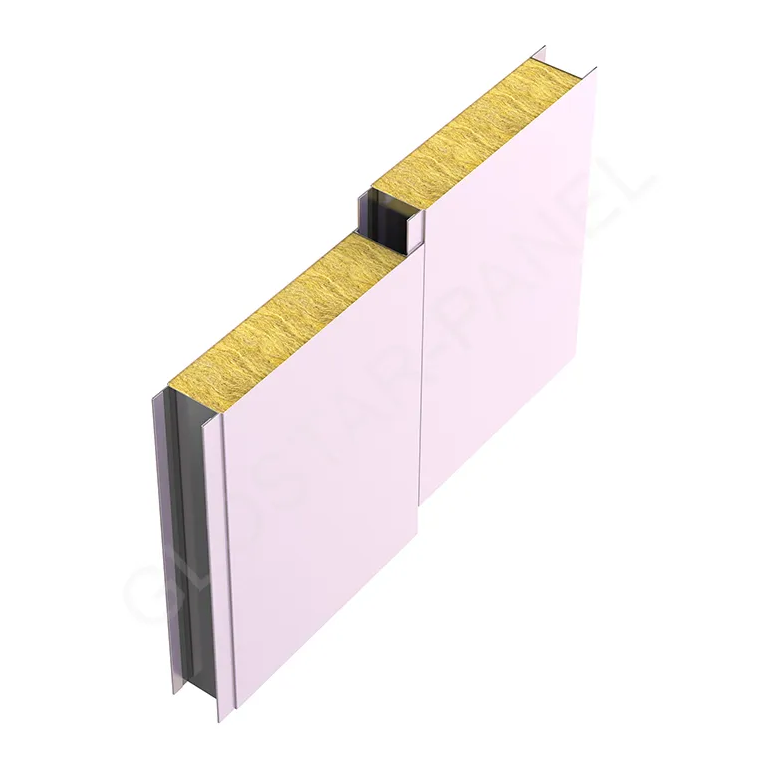
Whether you are building a brand new facility or retrofitting an older cleanroom suite, let's walk through the actual steps of installing an automatic sliding cleanroom door. The goal here is to demystify the process so you understand exactly what is involved and, more importantly, what to inspect to ensure the job is done correctly the first time. And while we are focusing on the moving parts of the door itself, it is worth noting that the surrounding wall structure is just as important. Companies like Glostarpanel specialize in manufacturing high quality cleanroom panel systems that provide the perfect, sturdy home for a door of this type. A door is only as good as the wall it hangs on.
Getting the Space and Structure Ready
Before you even think about tearing open the crate containing your shiny new door, there is a considerable amount of site preparation that needs to happen. You absolutely cannot just bolt a heavy automatic door assembly onto any flimsy wall and hope for the best. The rough opening in the wall has to meet specific size requirements, and more importantly, the wall itself must have the structural backbone to support the weight of the entire system.
First, let's talk measurements. The rough opening dimensions should strictly adhere to the submittal drawings and specifications that came with your particular cleanroom door model. For a typical external mount sliding door, you might be looking at a wall cutout that is at least eighty one inches high by thirty six inches wide, but do not assume anything. Always check the shop drawings. The real key factor that people sometimes forget is the side clearance. The door leaf has to have a place to go when it is open. You need a clear, unobstructed section of wall on the slide side that is at least as wide as the door leaf itself. If that space is not there, you have a major problem before you even start drilling holes.
Next, you must check the structural integrity of the wall. These door assemblies are heavy. We are talking about a heavy duty aluminum or stainless steel frame, a solid core door leaf often made of dense materials, a motorized track system, and all the electronic control boxes. That is a serious amount of weight hanging off the wall. If you are installing the door into a metal sandwich panel wall, you cannot simply attach the track directly to the panel skin without additional backing. Over time, it will sag. Once sagging begins, the door will no longer slide smoothly, the rollers will wear out faster, and the seals will misalign. You may need to install a steel header inside the wall cavity or provide some other form of internal structural reinforcement to give the door track a solid anchor point.
We also have to consider the environment itself. If the cleanroom is already operational, the installation crew must take extreme precautions to avoid contaminating the space. This means erecting temporary plastic containment barriers to isolate the work area from the rest of the suite. They should use HEPA filtered negative air machines to scrub any dust generated during drilling. And of course, the technicians must wear full cleanroom gowns to prevent shedding skin cells and fibers onto the floor. All cleanup should involve HEPA vacuums, never sweeping, to ensure no particulate matter gets kicked up into the airstream.
Finally, a note on labor. This is not a task for a general construction worker. The installation of a cleanroom door should be performed by qualified technicians who understand both the mechanical intricacies of automated door systems and the strict protocols of contamination control. They need to be comfortable with electrical wiring, capable of reading and strictly following manufacturer installation manuals, and experienced in verifying that the wall anchoring is sufficient before a single screw is driven.
Mounting the Track and Getting It Dead Level
Once the site is prepped and the wall is confirmed ready, the next major phase is installing the header track. This step is arguably the most critical part of the entire installation. If the track is not perfectly level, nothing else in the system will work correctly. The door will roll too fast downhill and struggle uphill. It might not close all the way, or it could bind up and stop moving entirely. Worse, an unlevel track puts uneven stress on the motor and rollers, which will significantly shorten the lifespan of your expensive cleanroom door.
To get this right, installers rely on a laser level. A standard bubble level simply does not provide the accuracy needed for this kind of precision work. The technician will hold the track assembly against the wall at the designated height, check it with the laser, and use shims as needed until it is perfectly horizontal. The tolerance for error here is incredibly small, usually less than one millimeter across the length of the track.
Then comes the actual mounting. The track needs to be fastened securely to the wall structure or, ideally, to the reinforced steel header we discussed earlier. The fasteners must bite into studs or a solid backer, not just the thin skin of a cleanroom panel. Once the track is mounted, the installer should step back and check the level one more time. It is common for the track to shift slightly as the screws are torqued down, so it is always worth a double check before moving on to the next step. The installer should also ensure that the inside of the track is pristine and free of any metal shavings or construction debris that may have fallen inside. Even a tiny piece of grit inside the track channel can cause the door to rumble, chatter, or jam.
In a cleanroom application, the interface between the track housing and the wall is also a potential leak path. The track cover should sit flush against the wall surface. Often, a bead of cleanroom grade, low outgassing silicone sealant is applied along the top edge to ensure that this joint is completely airtight. This helps maintain the room's pressure differential and stops unfiltered interstitial air from being sucked into the cleanroom through the wall cavity.
Hanging the Door Leaf and Connecting the Drive
With the track firmly in place, it is time to introduce the door leaf. You are definitely going to want an extra set of hands for this part. Whether the leaf is made of thick tempered glass or heavy gauge stainless steel, it is bulky and awkward to maneuver. The last thing you want is to drop the door or bang it against the wall, scratching up the finish before it has even been used.
The door leaf comes with a set of hanger brackets or roller carriages attached to its top edge. These are the wheels that will ride inside the track. The installer needs to lift the door up and carefully engage these rollers into the track channel. This can be a bit finicky and requires a steady hand and some patience to align everything just right.
Once the door is hanging freely from the track, the next job is to connect it to the drive mechanism. Most automatic sliding doors use a toothed timing belt made of fiberglass reinforced rubber. This belt runs inside the track and is driven by an electric motor. A specific bracket on the top of the door clamps onto this belt. When the motor spins, the belt moves, and the door slides along with it.
Before tightening all the hardware completely, the installer will usually slide the door back and forth manually a few times. They are checking for smoothness and listening for any scraping or binding. If the motion feels rough, they will make micro adjustments to the hanger brackets to ensure the door is perfectly plumb and perpendicular to the track. This is also the stage where they check the gap between the bottom of the door and the finished floor. In a cleanroom, that gap needs to be minimal to maintain the air seal, typically around five to ten millimeters. However, there must still be enough clearance so the door does not drag or scrape against the floor when moving.
The anti rise wheels or lock mechanisms should also be checked at this stage. These are small components that prevent the door from being lifted out of the track, either accidentally or intentionally. They lock the door securely into the overhead track and are an essential safety and security feature that should never be overlooked.
Getting the Seals Right to Keep the Room Clean
Now we arrive at the part that truly separates a cleanroom door from the automatic door you see at the grocery store. The sealing system. In a controlled environment, the door is not merely a passageway. It is a critical element of the contamination control strategy. The seals around the door perimeter must be flawless.
Most high quality cleanroom doors come equipped with specialized elastomeric seals or gaskets that run around the entire perimeter of the door leaf. These are typically made of silicone or EPDM rubber, materials chosen for their ability to withstand repeated exposure to harsh cleaning agents and disinfectants without degrading, cracking, or outgassing. When the door closes, these seals must compress evenly against the frame to create an airtight barrier that stops dust, airborne microbes, and moisture from passing through.
During the installation, the technician pays very close attention to how the door seats against the frame in the closed position. If the track was installed perfectly level and the hanger brackets were adjusted correctly, the door should naturally come to rest in the precise spot where the seals make full contact all the way around. But if something is even slightly off, you will see a gap. Maybe it is a sliver of light at the top corner or a slight unevenness along the bottom edge. That gap might look tiny, but in a room designed to maintain a specific pressure differential, even a small leak is a major failure. Air will always flow from high pressure to low pressure via the path of least resistance. If that path is a gap around your cleanroom door, the entire facility's performance is compromised.
In some applications, the door might also feature an automatic drop seal at the bottom. This is a seal that stays retracted while the door is moving to prevent dragging, but then drops down once the door stops to create a tight seal against the floor surface. These are especially common in pharmaceutical settings where the highest levels of hygiene and segregation are required. Getting the timing and pressure of this drop seal adjusted correctly takes some extra effort, but the improvement in overall room integrity is well worth it.
The installer should also perform a thorough visual inspection of all gaskets before the door is commissioned. Look for small tears, flattened sections, or manufacturing defects. A damaged gasket renders the entire sealing system ineffective. If a seal is compromised, it must be replaced immediately. There is no point in doing all this careful alignment work only to have a bad piece of rubber ruin the cleanroom's performance.
Connecting Power and Programming the Sensors
With the physical door installed and the seals looking good, the next step is to bring the door to life by connecting power and setting up the automation. This is where the hands free convenience really comes together.
The motor and controller unit are usually housed discreetly inside the track cover. The installer will run a dedicated power line to the door, ensuring all work complies with local electrical codes and safety regulations. It should go without saying, but the power must be turned off at the breaker before any wiring connections are made. Once the wiring is complete and double checked, the power can be restored, and the door's controller will power up.
The controller is essentially the brains of the operation. It monitors the door's position via an encoder and controls the speed of opening and closing, the hold open delay time, and how the door reacts to obstacles in its path. Most modern controllers are highly adjustable, which is a good thing because the factory default settings are rarely ideal for a specific cleanroom environment.
This is where the motion sensors come into play. An automatic sliding cleanroom door typically uses active infrared or radar based motion sensors to detect someone approaching. These sensors might be mounted above the door on the header or integrated into the side frame. The installer needs to position them and adjust their sensitivity so they reliably detect a person who wants to enter without triggering too early or too often.
If the sensors are set too sensitive, the door will open every time a lab coat walks past the room in the hallway. This is not just annoying; it introduces unnecessary air turbulence and potential contaminants into the cleanroom with every cycle. On the other hand, if the sensors are not sensitive enough, you end up doing an awkward dance in front of the door, waving your arms trying to get it to notice you. Finding that sweet spot requires a bit of trial and error. The technician will usually make adjustments and then test the door from multiple approach angles and distances.
Other programmable parameters include the opening speed, closing speed, hold open time before the door starts to close, and the final slow down speed as the door approaches the fully open or fully closed jamb. These settings can be fine tuned to match the specific traffic flow of the cleanroom. A busy corridor might need a faster opening speed and a longer delay, while a less frequently used transfer hatch might benefit from a slower, gentler motion.
Finally, the safety features must be tested. If the door encounters an obstruction while closing, it should immediately stop and reverse direction to prevent injury or damage to equipment. This is a non negotiable safety function that must be verified and documented during installation.
Final Testing and Making Sure Everything Is Perfect
You might be tempted to call the job finished once the door is sliding back and forth smoothly. But in a cleanroom environment, the installation is not truly complete until everything has been rigorously tested and validated. This final step is what distinguishes a professional, compliant installation from a hurried one.
The first round of testing is visual and manual. The installer will cycle the door dozens of times, watching and listening for any irregularities. Is the movement fluid and whisper quiet? Do the seals compress evenly against the frame? Does the door stop at the exact same position every single cycle? Any slight wobble, rattle, or hesitation indicates that a mechanical adjustment is still needed.
Next, the pressure differential across the door must be verified. The cleanroom should be able to maintain its specified positive or negative pressure with the door in the closed position. If the room's pressure monitor shows a drop or fluctuation while the door is static, it suggests there is an air leak somewhere around the door frame, the track housing, or the wall penetrations. A smoke pencil test can be used to visually identify these small but significant air leaks around the perimeter.
It is also wise to test the door's operation with the cleanroom HVAC system running at full capacity. Sometimes the air pressure inside the room can actually affect how a lightweight door leaf moves. The door should open and close just as smoothly when the room is fully pressurized as it does when the ventilation system is off.
Finally, all the paperwork should be wrapped up. The installer should provide a complete record of the controller settings that were programmed, a checklist of the performance tests that were completed, and any relevant warranty information or maintenance schedules. This documentation is vital for regulatory compliance audits and will be a lifesaver for troubleshooting if the door ever needs service in the future.
Once everything checks out and the door is operating flawlessly, the installation area can be thoroughly cleaned. All tools, scrap material, and packaging must be removed from the cleanroom, and the floor should be given a final wipe down to remove any footprints or dust left behind by the crew. The cleanroom can then be returned to full operation with the confidence that the new door will provide years of reliable, contamination free service.
Installing an automatic sliding cleanroom door is definitely more involved than hanging a standard interior door. But when you consider how dramatically it improves workflow efficiency and helps maintain the stringent cleanliness of the space, all that careful attention to detail is absolutely justified. And when the door is integrated into a high quality cleanroom panel system from a manufacturer like Glostarpanel, you have a complete, durable solution designed to keep your controlled environment exactly the way it needs to be. Clean and protected.