
לצאת למשתנה עבודה ולשאול מעלה לעבר גג עקום תמיד מעורר שטף של רגשות מעורבים. מצד אחד, יש תחושה אמיתית של התרגשות, משום שגגים עקומים פשוט נראים מרהיבים. הם מעניקים לבניין את האסתטיקה המודרנית והזורמת שלא ניתן להשיג עם מבנה שטוח ומרובע. זה מרגיש יצירתי ודינמי. מצד שני, יש את הקול הקטן המטריד שבעורף המוח מזכיר לך שמעטפת עקומה היא יצור שונה לחלוטין. לא ניתן פשוט להתקין כמה דפים שטוחים ולסיים את העניין. אם תנסו לגשת לכך בדרך הזו, תקבלו פערים בכל מקום, מים שימצאו את דרכם פנימה, וקו הגג שנראה כאילו הוא הורכב בבהילות.
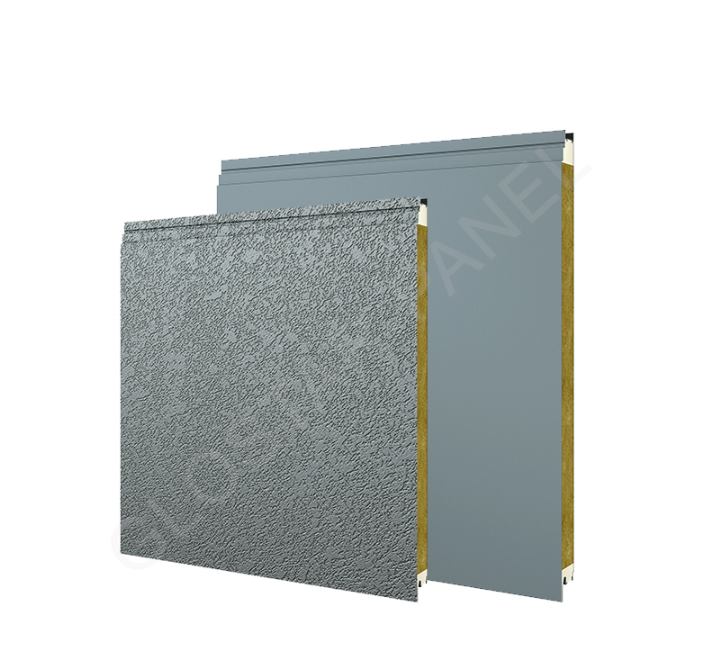
כאן בדיוק לוח סנדויץ' צמר סלע הופך לחומר כה ערכי. כאשר אתם מתמודדים עם מחסנים קמורים, אולמות ספורט פנימיים או כל עיצוב אדריכלי ייחודי שדורש פרופילים מיוחדים, לוח זה הוא מושיע נפש. הוא מספק את התנגדות האש והביצועים התרמיים שדרישות הבנייה דורשות, ובכל זאת שומר על די גמישות כדי לעקוב אחר הקשת של הגג כאשר מטפלים בו כראוי. אבל בואו נהיה כנים לעצמנו לרגע. התקנת לוח סנדוויץ' מבד חומוס על גג מעוקל אינה דומה להרכבה של בלוקי בניין מרובעים. עליכם לקחת בחשבון ברצינות את הרדיוס הספציפי, את הדרך שבה הפרופילים המיוחדים עוברים בקצוות ובזקיפים, ובעיקר – כיצד תנהלו את זרימת המים כדי שלא יהיו דליפות נסתרות. חברות כמו Glostarpanel מבינות שהמערכת של הקירות והגג חייבת לפעול יחדיו כיחידה אחת מאוחדת. הלוח עצמו הוא רק חצי מהמשוואה; האיכות של ההתקנה היא מה שמגשים באמת את ביצועיו. המטרה כאן היא לעבור בתהליך הזה בבירור, כך שכשהתבוננותכם הסופית בקשת החלקה והמתמשכת תביא אתכם לרגשות של גאווה בעשייה מוצלחת.
השגת היסודות הנכונים
לפני שתחשבו בכלל על להרים את הלוח הראשון של פאנל סנדוויץ' מבד סלע, עליכם להשקיע זמן משמעותי בבדיקה המרחבית של המבנה שמתחת. המבנה הסטלי, ובמיוחד הפורלינים והקרניים העקומות, הוא השלד שמחזיק את כל השאר. אם שלד זה עקום או לא אחיד, המעטפת שתרחיבו מעליו תיראה באותה מידה עקומה. לכן, הצעד הראשון והחשוב ביותר הוא בדיקה מדוקדקת של העקמומיות. עליכם לוודא שהרדיוס של מסגרת הפלדה תואם בדיוק את مواصفות העיצוב ונותר אחיד לאורך כל התחום. אם קטע אחד יורד נמוך יותר או מתעקל החוצה ברדיוס גדול יותר מאשר הקטע הצמוד לו, תתקלו בבעיה קשה מאוד בניסיון להניח את הלוחות באופן שטוח על פני הפרופיל.
אתם גם צריכים להתייחס למרחקים בין הקורות. לוחות הסנדוויץ' של צמר סלע יכולים לכסות טווח מסוים ללא נפיחות, אך הטווח הזה תלוי לחלוטין במטען הצפוי ובעובי הלוח שבחרתם. אם המרחק בין הקורות גדול מדי בהשוואה ליכולת התמיכה במשקל של הלוח, הגג עלול להתכופף תחת משקל השלג או תחת כוח הרוח. הכיפוף המתמיד הזה, גם אם נראה מזערי, יפגע בסופו של דבר באختומים בחלקי החיבור של הלוחות. וטרם תתחילו לקבוע כלום, ודאו שהמבנה הפלדה נקי, יבש ופנוי לחלוטין מסריגות חדים או נקודות ריתוך מיותרות. שריטה קטנה במעטפת הלוח היום תהפוך למכת שרטון מכוערת מחר, ואף אחד לא רוצה לראות כתם חום שמקלקל את המראה של גג מעוקל חדש לגמרי.
מדידה והיערכות לתכנון פריסת הלוחות
שלב זה הוא מה שמפריד באמת בין צוות מקצועי לקבוצת חובבים שפועלת בסופי שבוע. על גג שטוח סטנדרטי אפשר להיות קצת פחות מדוייק במדידות, מכיוון שניתן תמיד לחתוך מעט מקצה הרכיב באמצעות מסור. על משטח מעוקל הגאומטריה היא הרבה פחות סולחת. יש לחשב את אורך הקשת המדויק. כלומר, יש לטפס לשם עם סרט מדידה גמיש ולמדוד את המרחק האמיתי לאורך הקשת מהקצה התחתון של הגג (האווה) ועד לקצה העליון שלו (הריג'). אל תעשו את הטעות למדוד את המרחק הישר בין שתי נקודות אלו. אורך המיתר הזה קצר מאורך הקשת, ואם תסתמכו עליו, תמצאו את עצמכם חסרי חומר בדיוק ברגע הגרוע ביותר האפשרי.
ברגע שחשבתם את אורך הקשת האמיתי, עליכם לתכנן את סידור הלוחות בקפידה. עבור מבנה מעוקל, התרחיש האידיאלי הוא למזער את מספר המפרקים האופקיים אם אפשר, אך עליכם גם להיות ריאליים בנוגע לטיפול בחומר. לוחות ארוכים כבדים מאוד ויכולים להיות מסובכים ביותר בהנעה סביב עקומה ללא נזק להם. עליכם לקבוע בדיוק איפה ימוקמו מפרקי ההכפפה שלכם. הכלל הזהב לכל גג של לוחות סנדוויץ' מצמר סלע הוא תמיד להכפיל בכיוון זרימת המים. דמיינו זאת כמו כיסוי גג בית בלוחות קש. הלוח העליון חייב תמיד לכסות את הלוח התחתון. אם תהפכו את הסדר הזה, הכבידה תמשוך את המים ישר לתוך המפרק, והמים ימצאו דרך להיכנס לתוך מעטפת הבניין. זה חשוב במיוחד בגג מעוקל בעל שיפוע נמוך, שבו המים זורמים לאט יותר ויש להם זמן רב לדייק במפרק מכוסה באופן לקוי.
חיתוך והתאמה של הפרופילים המיוחדים
כעת אנו מגיעים לחלק של המשימה שיבדוק באמת את סבלנותכם. הקטע האמצעי של העקומה הוא בדרך כלל החלק הקל. לוח סנדויץ' צמר סלע יהפוך באופן טבעי כדי לעקוב אחר הרדיוס כל עוד הקשת אינה צמודה מדי. אך הקצוות, המעברים לאורך קצות הגג והקווים העליונים, אלו הם המקומות שבהם הפרופילים המיוחדים באים לשימוש ממשי. נדיר מאוד להשיג חתך מושלם וنظيف, הדומה לזו שמיוצרת במפעל, אשר תואם בדיוק את העקומה המורכבת של קצה גבון או מחסום עין על הצלע הראשונה בנסיון הראשון.
בעת חיתוך לוחות אלו, במיוחד בקצותיהם שבהם הם חייבים להסתיים בתוך קורה עגולה מפלדה, עליכם להאט ולתת את הזמן הדרוש. השתמשו במברשת עגולת חיתוך עם שיניים עדינות או במגרט כדי לחתוך באופן נקי את הקליפות המетליות ואת הליבה של צמר סלע. עליכם להימנע מהקרע של הקליפה המטלית או דחיסת הליבה המבודדת, שכן זה יוצר נקודת חולשה. במיוחד בצמר סלע, בקרת האבק מהווה בעיה אמיתית. צמר סלע מצוין לבטיחות מפני אש, אך הסיבים שלו עלולים לגרום לעייפות לעור ולריאות. תמיד לבשו מסכה מתאימה וכפפות. לאחר השלמת החתך, חשוב מאוד לסתום את הקצה הפתוח. השארת הליבה של צמר הסלע חשופה למטאורולוגיה היא פרקטיקה רעה. לחות תחדור ישירות לתוך הלוח, תפחית את ערך הבודד החום שלו לאורך זמן ותביא בסופו של דבר להתנתקות שכבות.
הצמדת הלוחות בבטחה
התקנת פאנל סנדוויץ' מבד חומוס אבן מעוקם היא תהליך שונה מהתקנת פאנל שטוח. על גג שטוח, הכבידה היא הכוח העיקרי שעליו אתם מתמודדים. היא מפעילה כוח ישר כלפי מטה. עם זאת, בעקומה, אתם גם מתמודדים עם כוחות מתח ולחיצה. הפאנל רוצה באופן טבעי למתוח את עצמו או להחליק לאורך המדרון של הבצ"ר. כדי לשמור עליו במקום, עליכם להתחיל בהתקנה מהתחתית או מאחד הקצוות היציבים ולעבוד כלפי מעלה או לאורך העקומה. טכניקה זו מאפשרת לכם לדחוף את הפאנל בצמוד לפאנל הקודם ומבטיחה שהחיבור הצידי (Lap Joint) יהיה מלא ויעיל לפני שתфикסו אותו.
כאשר מחזקים את הפסים לתקרת הפולינס, ודאו שהם נחדרים במדויק בזווית ישרה ומאונכת לפני השטח. אם תחדירו ברגה בזווית, הראש לא יתייצב כראוי על פרופיל הלוח. כך נוצר פער קטן או שקע שבו מים יכולים להתאסף ולחלחל בסופו של דבר. על משטח מעוקל, מים נוטים לנוע לאורך הנתיב בעל ההתנגדות הנמוכה ביותר. השתמשו תמיד בברגים שמתואמים למחברת איטום מזג אוויר מתאימה המצורפת אליהם. המחברת חייבת להידחס מעט כדי ליצור איטום, אך לא עד כדי כך שהיא תתנפח או תישחק או תצוץ החוצה מתחת לראש הברגה. חיבור יתר של ברגה הוא אחת השגיאות הנפוצות והמזיקות ביותר באתר בנייה. זה דוחס את פרופיל הלוח, יוצר שקע שמאגר מים, ומחליש את האחיזה המכנית של הברגה. סובבו את הברגה רק עד שהמחברת ממלאה את החלל שמתחת לראש הברגה. זכרו כי מכיוון שמדובר במשטח מעוקל, הלוח נמצא במתח מתמיד. אל תחסרו במספר הברגים. עקיבו بدיקת המרחקים המומלצים של היצרן בקפדנות, במיוחד באזורים עם רוח חזקה או באזורים שבהם רדיוס הגג צמוד במיוחד.
חיתום המפרקים והגנת הפרטים
אם קיים פרט אחד בלבד שיגרום לכם להישאר עירנים בלילה, גם זמן רב לאחר שהבנייה הסתיימה והמבנה נכנס לשימוש, זהו הפחד ממים שימצאו את דרכם פנימה דרך מפרק. בגג המורכב מחומרים מרופדים של צמר סלע מעוקל, המפרקים האורכיים בין לוחות הם הנקודה החולשה הגדולה ביותר. קצות הלוחות חייבים להתאמה באופן מושלם. לפני שתתקיעו את הלוח הבא, עשו שורה רציפה של חומר איטום באיטיל באיכות גבוהה שאינו מקשיח, או הפעילו את סרט האיטום המומלץ על ידי היצרן לאורך כל אורך המפרק. אתם רוצים לראות שחלק קטן מהחומר נדחס החוצה כאשר שני הלוחות מתכנסים זה אל זה. השורה הקטנה הזו של החומר הנדחס החוצה היא ההוכחה הוויזואלית שלכם לכך שהמפרק מלא לחלוטין ואין בו חורים חבויים שדרכם יכולים המים לחדור.
אז עלינו לדבר על חציצות. הפרופילים המיוחדים בזווית העקומה של הרכס ובזווית העקומה של הקצה התחתון הם המקום שבו נגלית האומנות האמיתית של ההתקנה. פשוט לא ניתן להיכנס לחנות כלים ולרכוש חציצה סטנדרטית, מוכנה מראש, למבנה עם גג עקום מותאם אישית. חלקים אלו בדרך כלל צריכים להיעשות במקום עצמו, או שאותם יש להזמין מראש כדי להתאים בדיוק לרדיוס המבנה. יש לרצות שהחציצות יכסו את קצות הלוחות בהפרש גדול מספיק כדי שגשם שנישא על ידי הרוח לא יוכל להידף כלפי מעלה ולחלחל מתחתן. יש להתייחס בקפידה מיוחדת לפרטי הקצה התחתון. בשל העקמומיות, המים ינטו לזרום לכיוון המרכז או לכיוון הקצוות, בהתאם למורכבות השיפוע. יש צורך בחציצה מתאימה לקצה התחתון שתחזיר את המים החוצה ורחוק מהקיר שמתחת. אם תאפשרו למים לזרום פשוט לאורך הפנים של ה לוח סנדויץ' צמר סלע ולמעלה לקצה הצדדי, אתם מזמינים צרות בצורת כתמים מלוכלכים, צמיחת עופרת ודליפות פוטנציאליות סביב חלונות או דלתות שתחתיהם.
בדיקות סופיות וניקוי
ברגע שהלוח האחרון ננעל במקומו והסcrew האחרון הושחל, התאווה לאסוף את הכלים ולצאת הביתה חזקה מאוד. אך עצרו למספר דקות נוספות. עליכם לעבור על כל הגג ולבדוק אותו מכל זווית אפשרית. הסתכלו לאורך העקומה של הגג ובדקו אם יש סימנים של תופעת 'קערת שמן' (oil canning), כלומר גלים או בליטות שמתגלות לעיתים קרובות בלוחות מתכת. גל קל מאוד עלול להיות בלתי נמנע ברדיוס גדול, אך בליטה או שקע בולטים מצביעים על בעיה במבנה התומך או בתבנית החיבורים שמתחת.
בדקו כל חלק של החשיפה (Flashing) כדי להבטיח שהוא מושך בקפדנות נגד פנים הלוח. ולאחר מכן, וזה החלק שברוב המקרים כולם שוכחים, עליכם לנקות את הבלגן. אינכם יכולים להשאיר את שavings המתכת הקטנים והספירלות שנוצרו מהבורגים פשוט מונחים שם על פני הגג. הגלילים הקטנים של פלדה גולמית יחלו לעלות חלד כמעט מיד לאחר הגשם הראשון או טיפת הטל הכבדה. הם יותירו כתמים כתומים מכוערים שיזרמו ישר לאורך העקומה היפה של הגג החדש שלכם. מדחף עלים או מטאטא רך עם ניידות הן החברות הטובות ביותר שלכם בשלב זה. הסירו את כל הפסולת הזו ואת כל השאריות מהפני השטח, כך שהגשם הראשון ישטוף גג נקי ומזוהר במקום גג עם כתמים של חלד.
התקנת פאנל סנדוויץ' מבד חומוס על גג מעוקל עם פרופילים מיוחדים היא ללא ספק משימה דרמטית יותר מאשר עבודה על גג שטוח סטנדרטי. המשימה דורשת תכנון מקדים רב יותר, סבלנות רבה בהרבה במהלך הסידור, ותשומת לב מוגברת לפרט בכל פינה ובכל מעבר. אך כאשר מבצעים אותה כראוי, התוצאה הסופית היא בניין שמתבלט מסיבות הנכונות. זהו מבנה יעיל מבחינה אנרגטית, בטוח מפני סיכונים של שריפה, ומושלם מבחינה חזותית. וכאשר עובדים בשותפות עם ספק מנוסה כמו Glostarpanel, מקבלים את התמיכה ואת החומרים באיכות גבוהה שזקוקים להם כדי להפוך את העקומה המאתגרת הזו למשימה קלה ביותר.